You finally decided to do it. You’re going to retrofit your existing kitchen cabinets, and pantry, with pullout kitchen drawers and you’ve going to do the installation yourself. Your partner says BRAVO! but your mind goes back to previous DIY installation disasters. You remember the multi-page manuals in 6 different languages and the poor English. The soft metal bolts easily ruined if cross-threaded. You hope this is NOT going to be one of those experiences again. Let me assure you it is not. Here are 5 reasons why nothing installs easier than our slide out kitchen drawers to install.
1. YOU ARE ATTACHING PULL OUT DRAWERS TO THE SHELF NOT THE CABINET WALLS
Drawer slides come in 2 sets. Normally, one set is attached to the drawer and the other set attaches to the cabinet walls. The pull out drawer width is carefully set to allow the drawer rails to tightly interlock with the cabinet wall rails.
Problems can arise if the pull out drawer width is too wide, the drawer will bind and is too loose, the pull-out drawer will pop out under the load. Attaching sliding pullout drawer rails to cabinet walls in existing cabinets is tough especially if the cabinet has a fixed middle shelf.
You will only have a foot of space to work in. Usually, at least one or both of the rails have spacers to hold the rail away from the cabinet wall to allow the sliding drawer to clear some obstruction like a door hinge. The option here when working with a cabinet wall is to break out the fixed shelf. Now you have more room to work with but the inside of your cabinet looks a mess.
Our roll out drawer design eliminates both of these problems and makes the installation of pull out shelves in any existing cabinet so much easier.
2. OUR SINGLE UNIT BASE PULLOUT KITCHEN DRAWER DESIGN
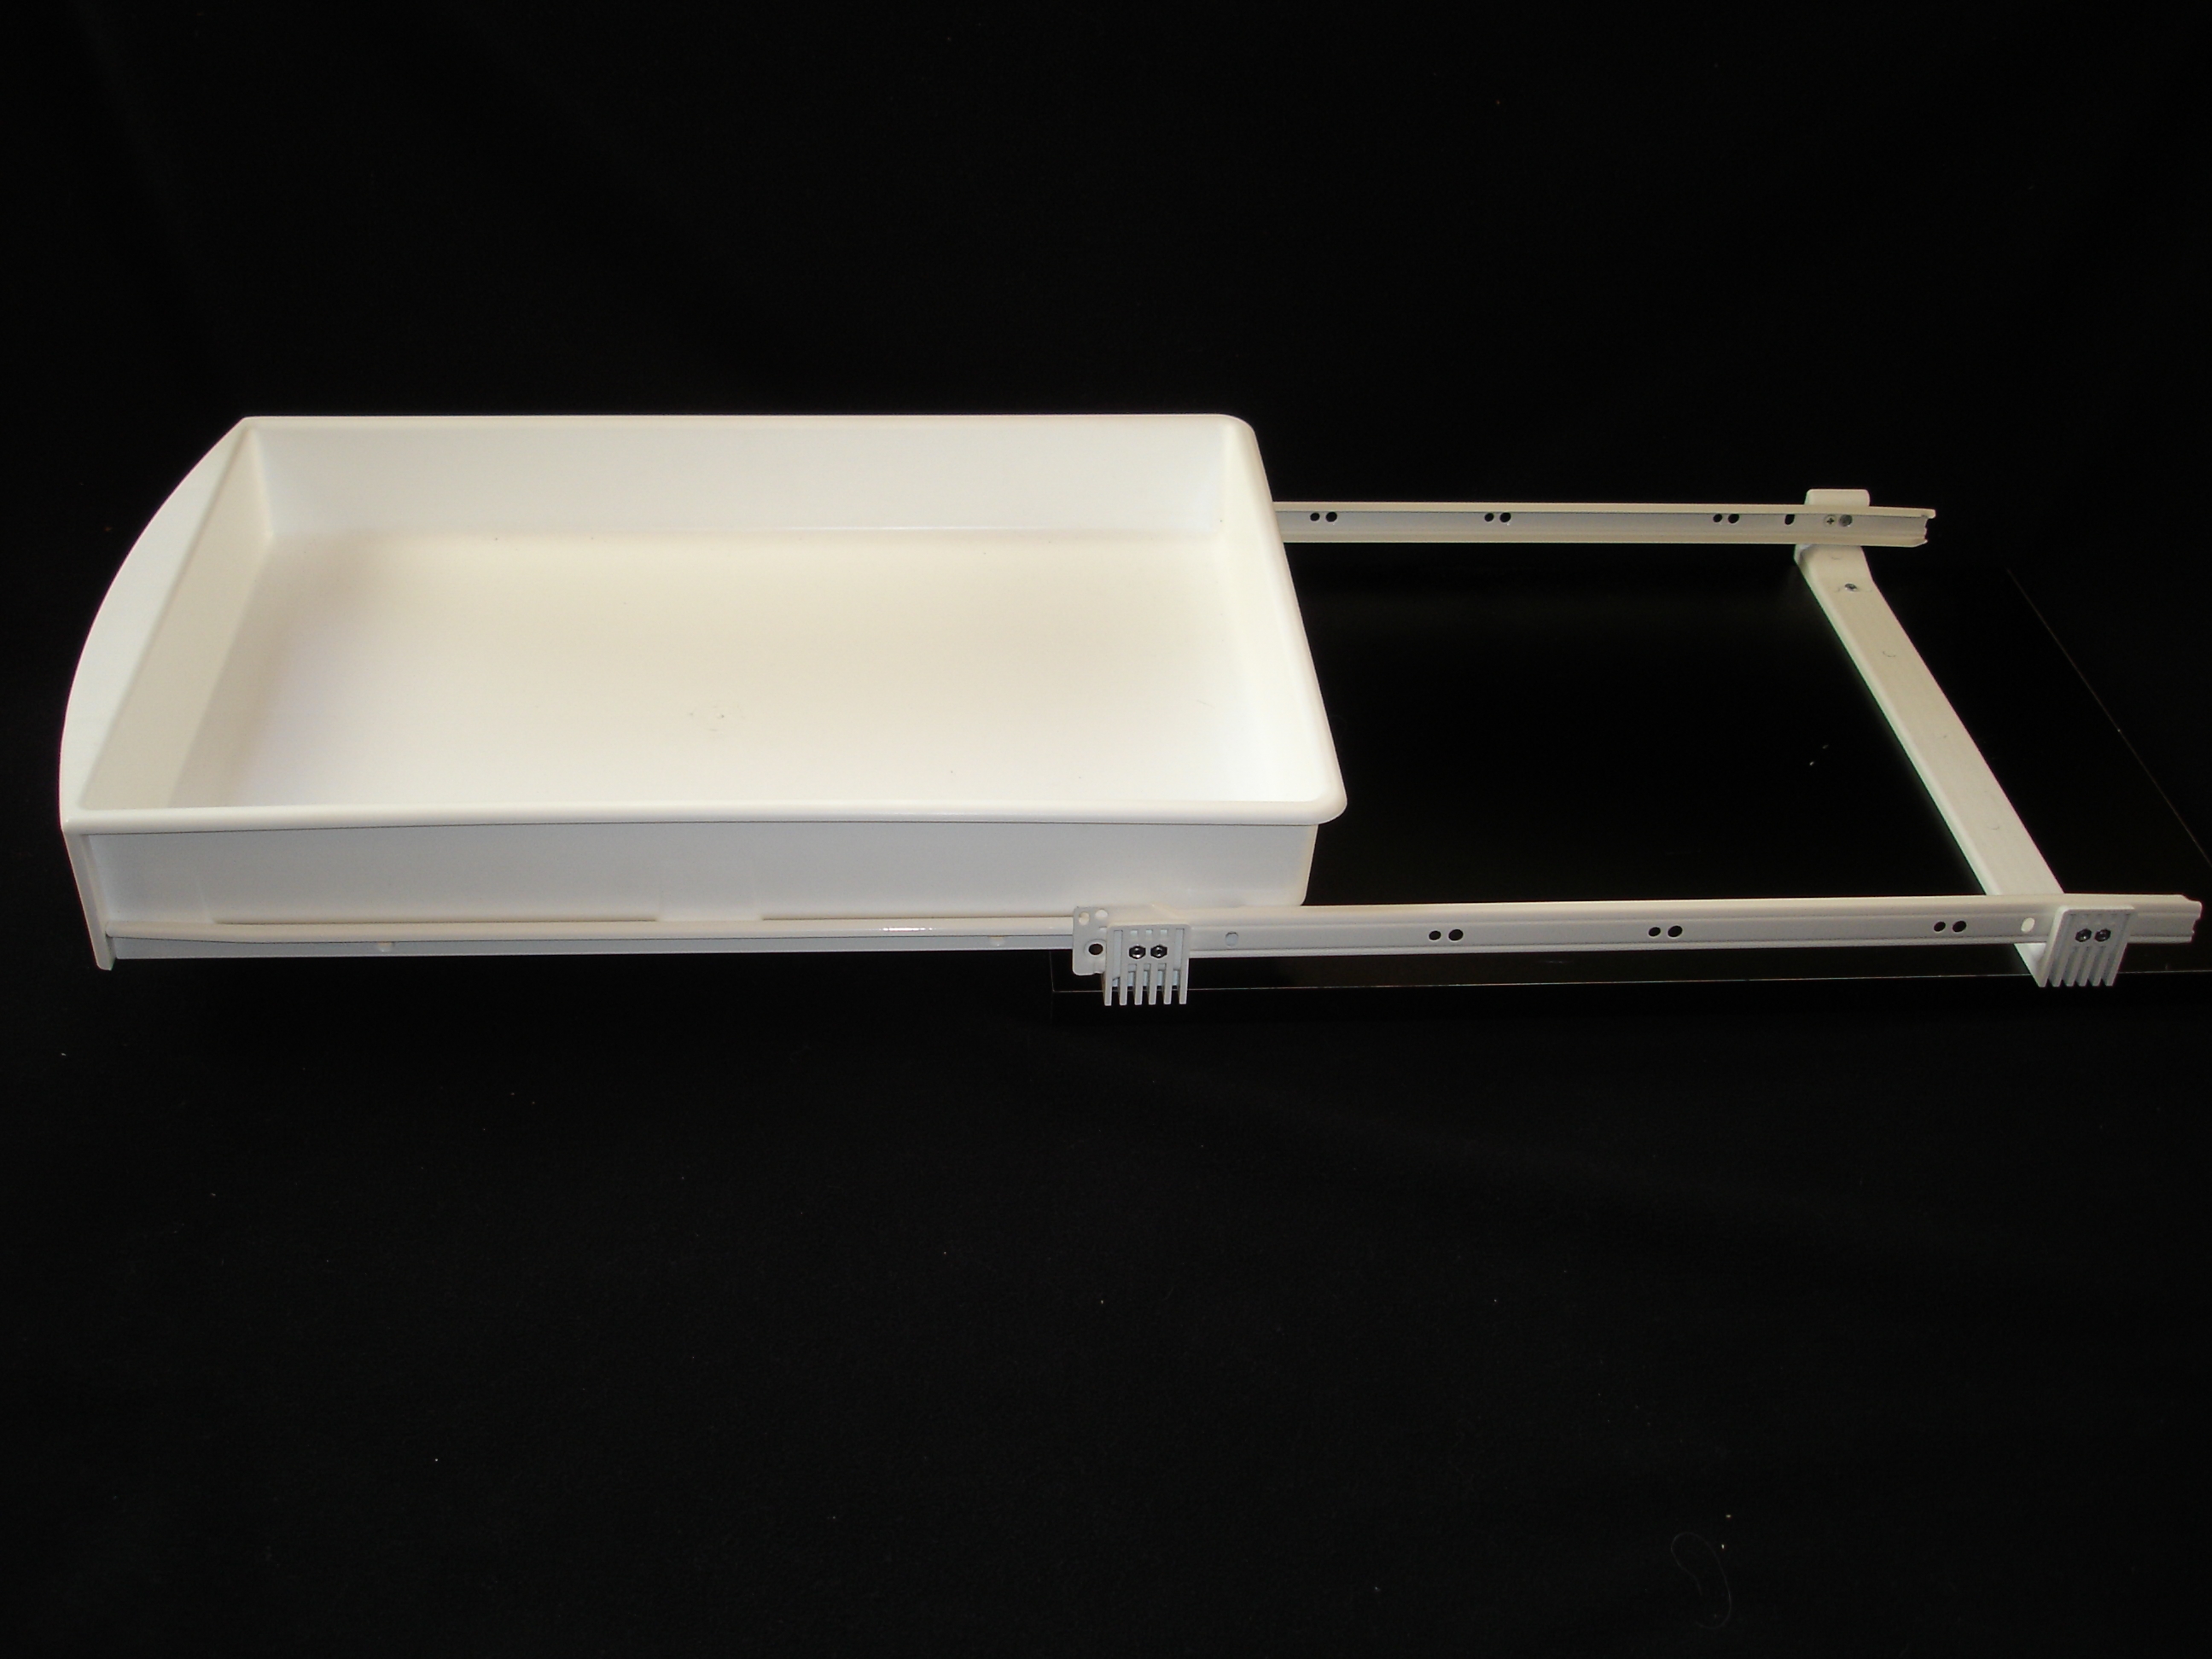 To overcome, the above cabinet wall installation issues, we designed a base unit to hold the cabinet rails. This allows the pullout shelf to be screwed to the interior shelf instead of the cabinet walls. We attach the cabinet rails to the base, the base is a single unit, and it is sold as pre-assembled. All you have to do is slide the base onto a shelf and screw the base to the shelf with the 4 provided screws. Installation done!
We attach the cabinet rails to the base, the base is a single unit, and it is sold as pre-assembled. All you have to do is slide the base onto a shelf and screw the base to the shelf with the 4 provided screws. Installation done!
3. OUR CENTERING GUIDE
Another little detail that is not easy to see is the centering guide on competitor roll out shelves. In the center of each base cross member is an arrow. Simply mark your shelf where you want the middle of the drawer to sit and then match the arrow to the mark.
4. OUR PRE-DRILLED HOLES IN THE BASE
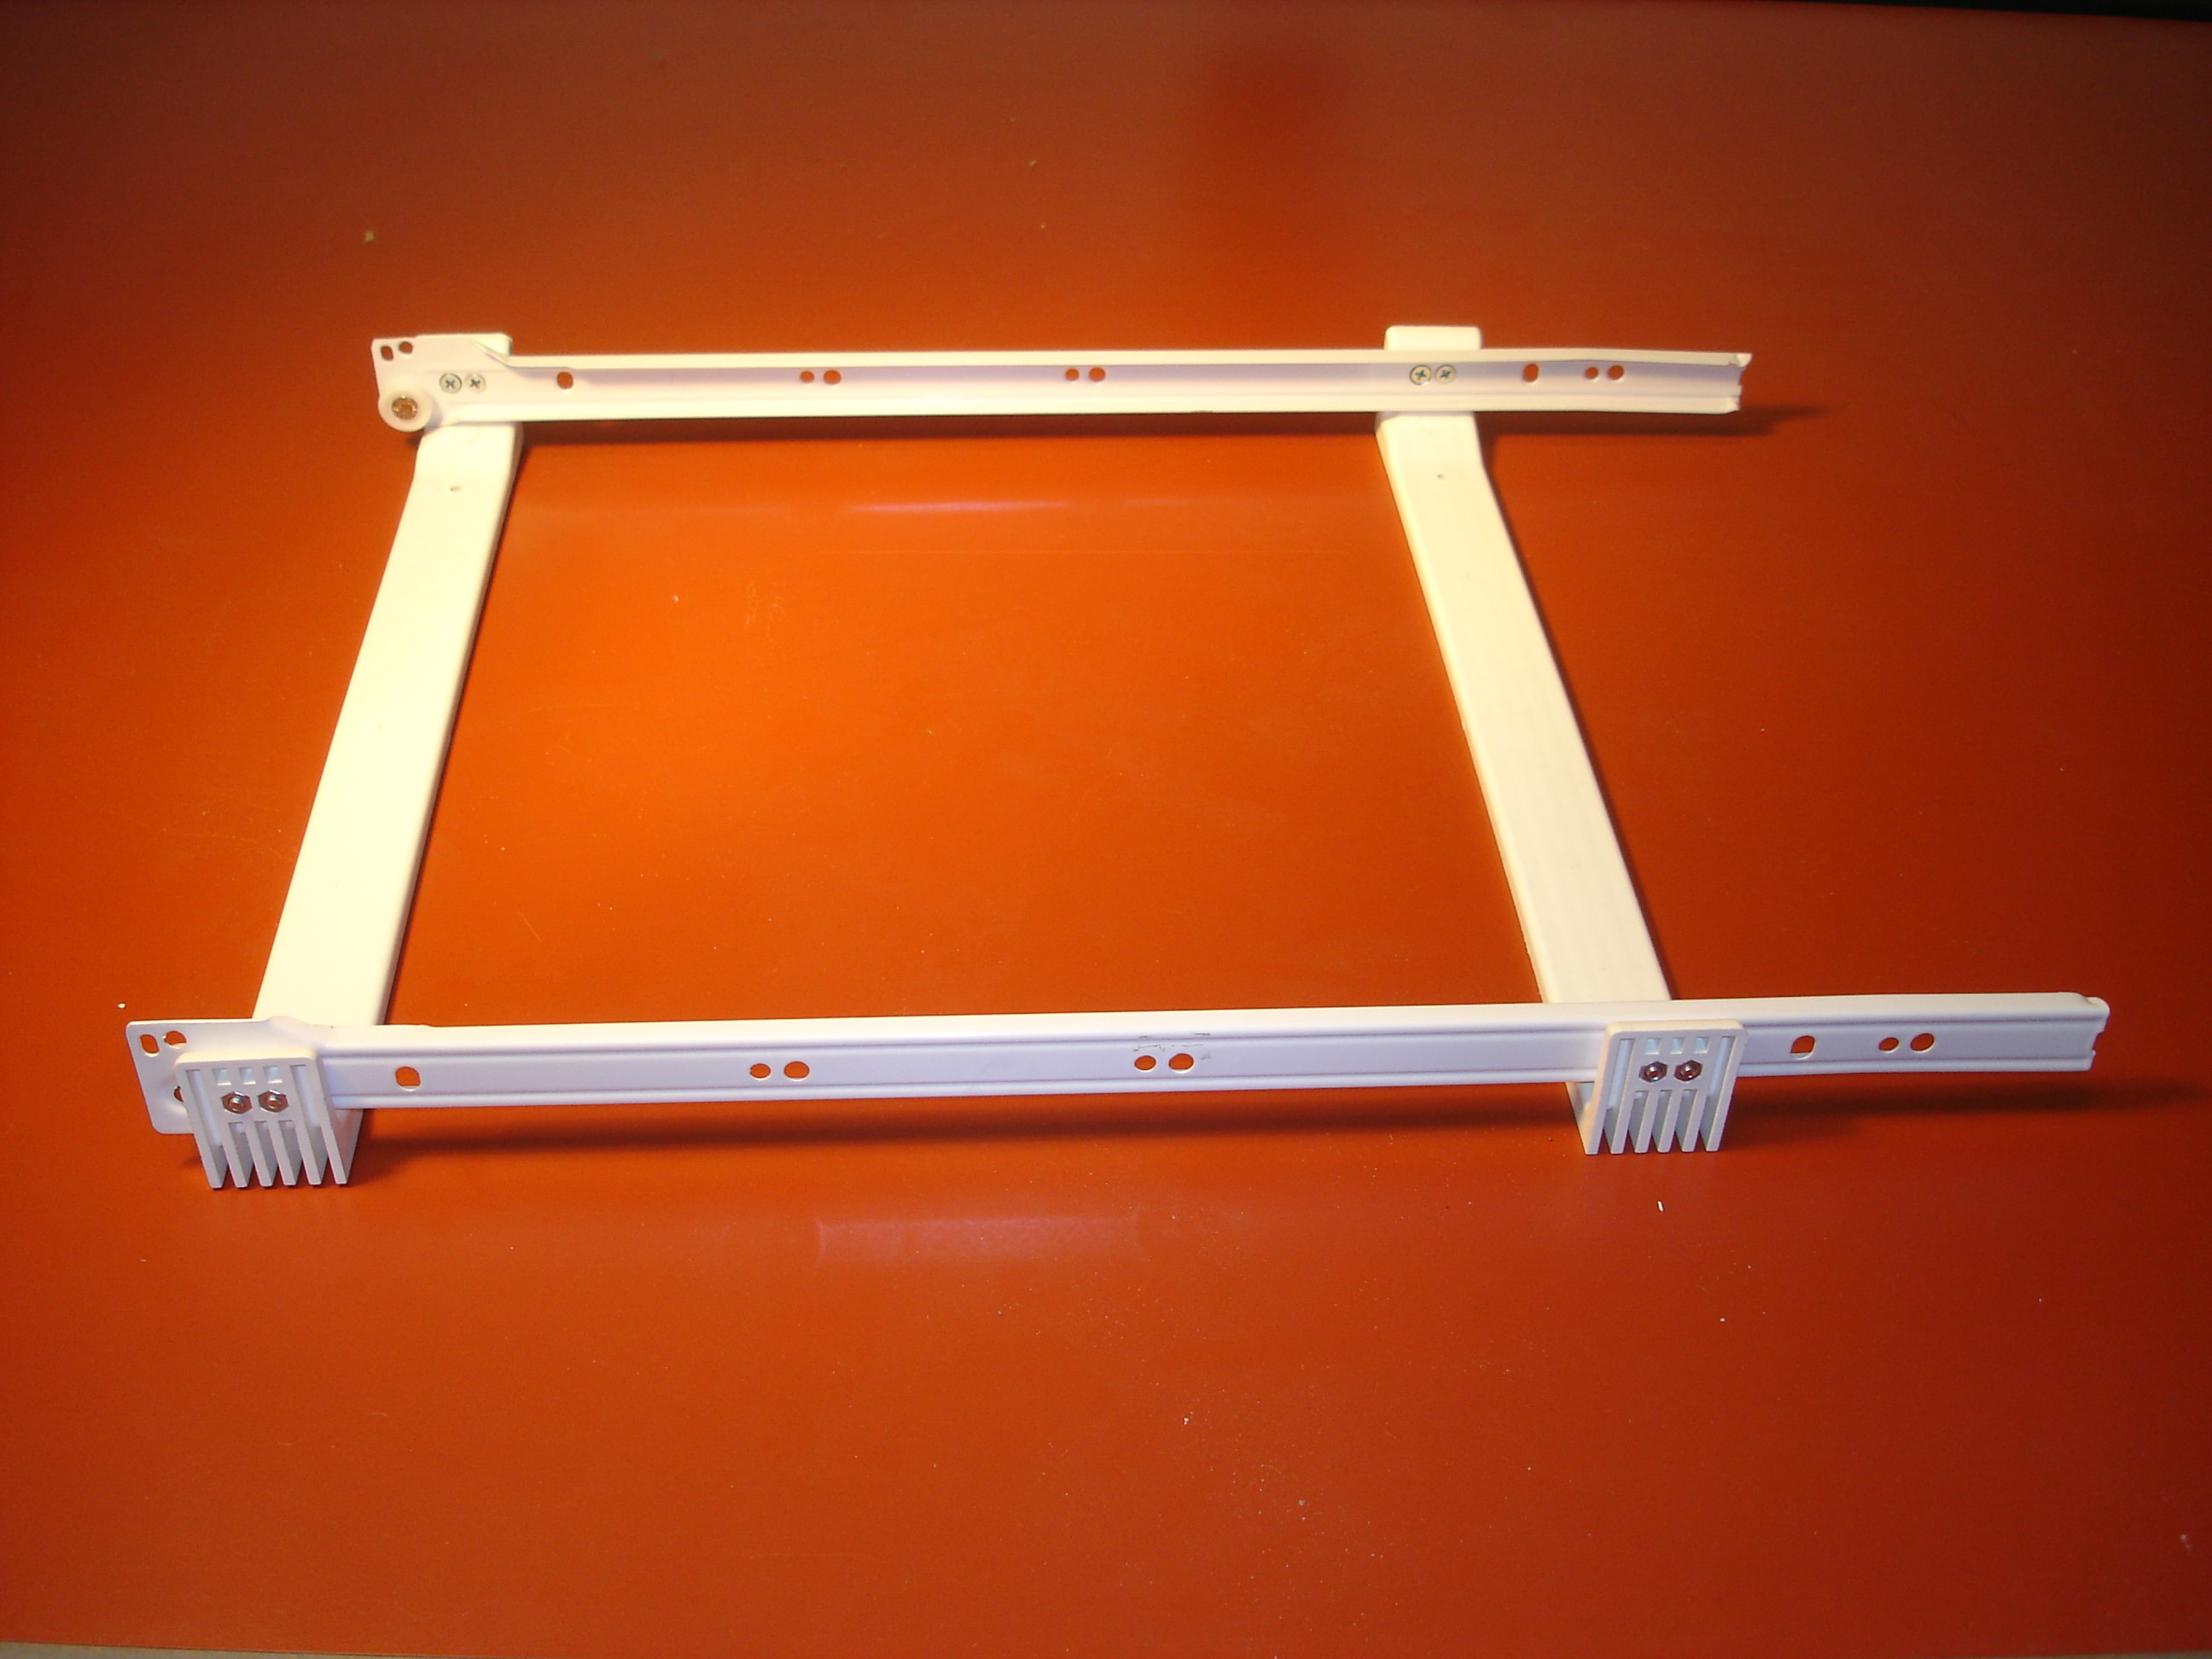 Again, another little detail designed to make installation as easy as possible is the pre-drilled holes in our base unit. Guess what they hold a screw upright. When you want to install the back screws in particular, just place both in the pre-drilled holes, slide the roll-out drawer base back into position and the screws are sitting there waiting to be drilled.
5. EVERYTHING ASSEMBLED & PRE-ALIGNED
Not only do we attach the cabinet rails to the base, we attached the drawer rails to the pull out drawer. The width of our pullout kitchen drawers, and the width of our base unit are designed so the inner and outer rails interlock perfectly. Everything is not only assembled but pre-aligned.
Some of our competitors provide 4 separate ‘L’ angles as a base unit. Essentially what you have to do is both the assembly and alignment. This mean that YOU attach the cabinet rails to the ‘L’ angles. And YOU have to attach one side and fix it in place. YOU then place the other side in roughly the right spot (there are slots in the ‘L’ angles, so YOU can adjust to the final position).
Then YOU put the drawer in the base and move the base into where the drawer seems to slide easily. YOU remove the drawer carefully so the rails don’t move. Finally, YOU screw down the ‘L’ angles in the final position. If YOU get anything wrong like; the rails too tight, rails too loose then guess what? YOU repeat until YOU get it right.
Save on time, effort and frustration with the Roll Out Kitchen Drawers patented design, With our design, YOU don’t have to worry about any of these problems above. We’ve done everything possible to make our pullout kitchen drawer as easy as possible to install. We applied for a US Patent on our design and were awarded a patent. If you look carefully underneath the front of our drawer you will see the number…6,659,576 B1.
Watch the video to learn how easy it is to install pullout kitchen drawers
Speak to Rollout kitchen drawers about your questions. Learn how to measure a slide out kitchen shelf for your cupboard.