You may be older…may be on a fixed income…may have mobility issues. You live in a park model or manufactured home with kitchen cupboards that do not have pull-out shelves or slide-out pantry drawers. You would be IN HEAVEN if only you could find an affordable solution.
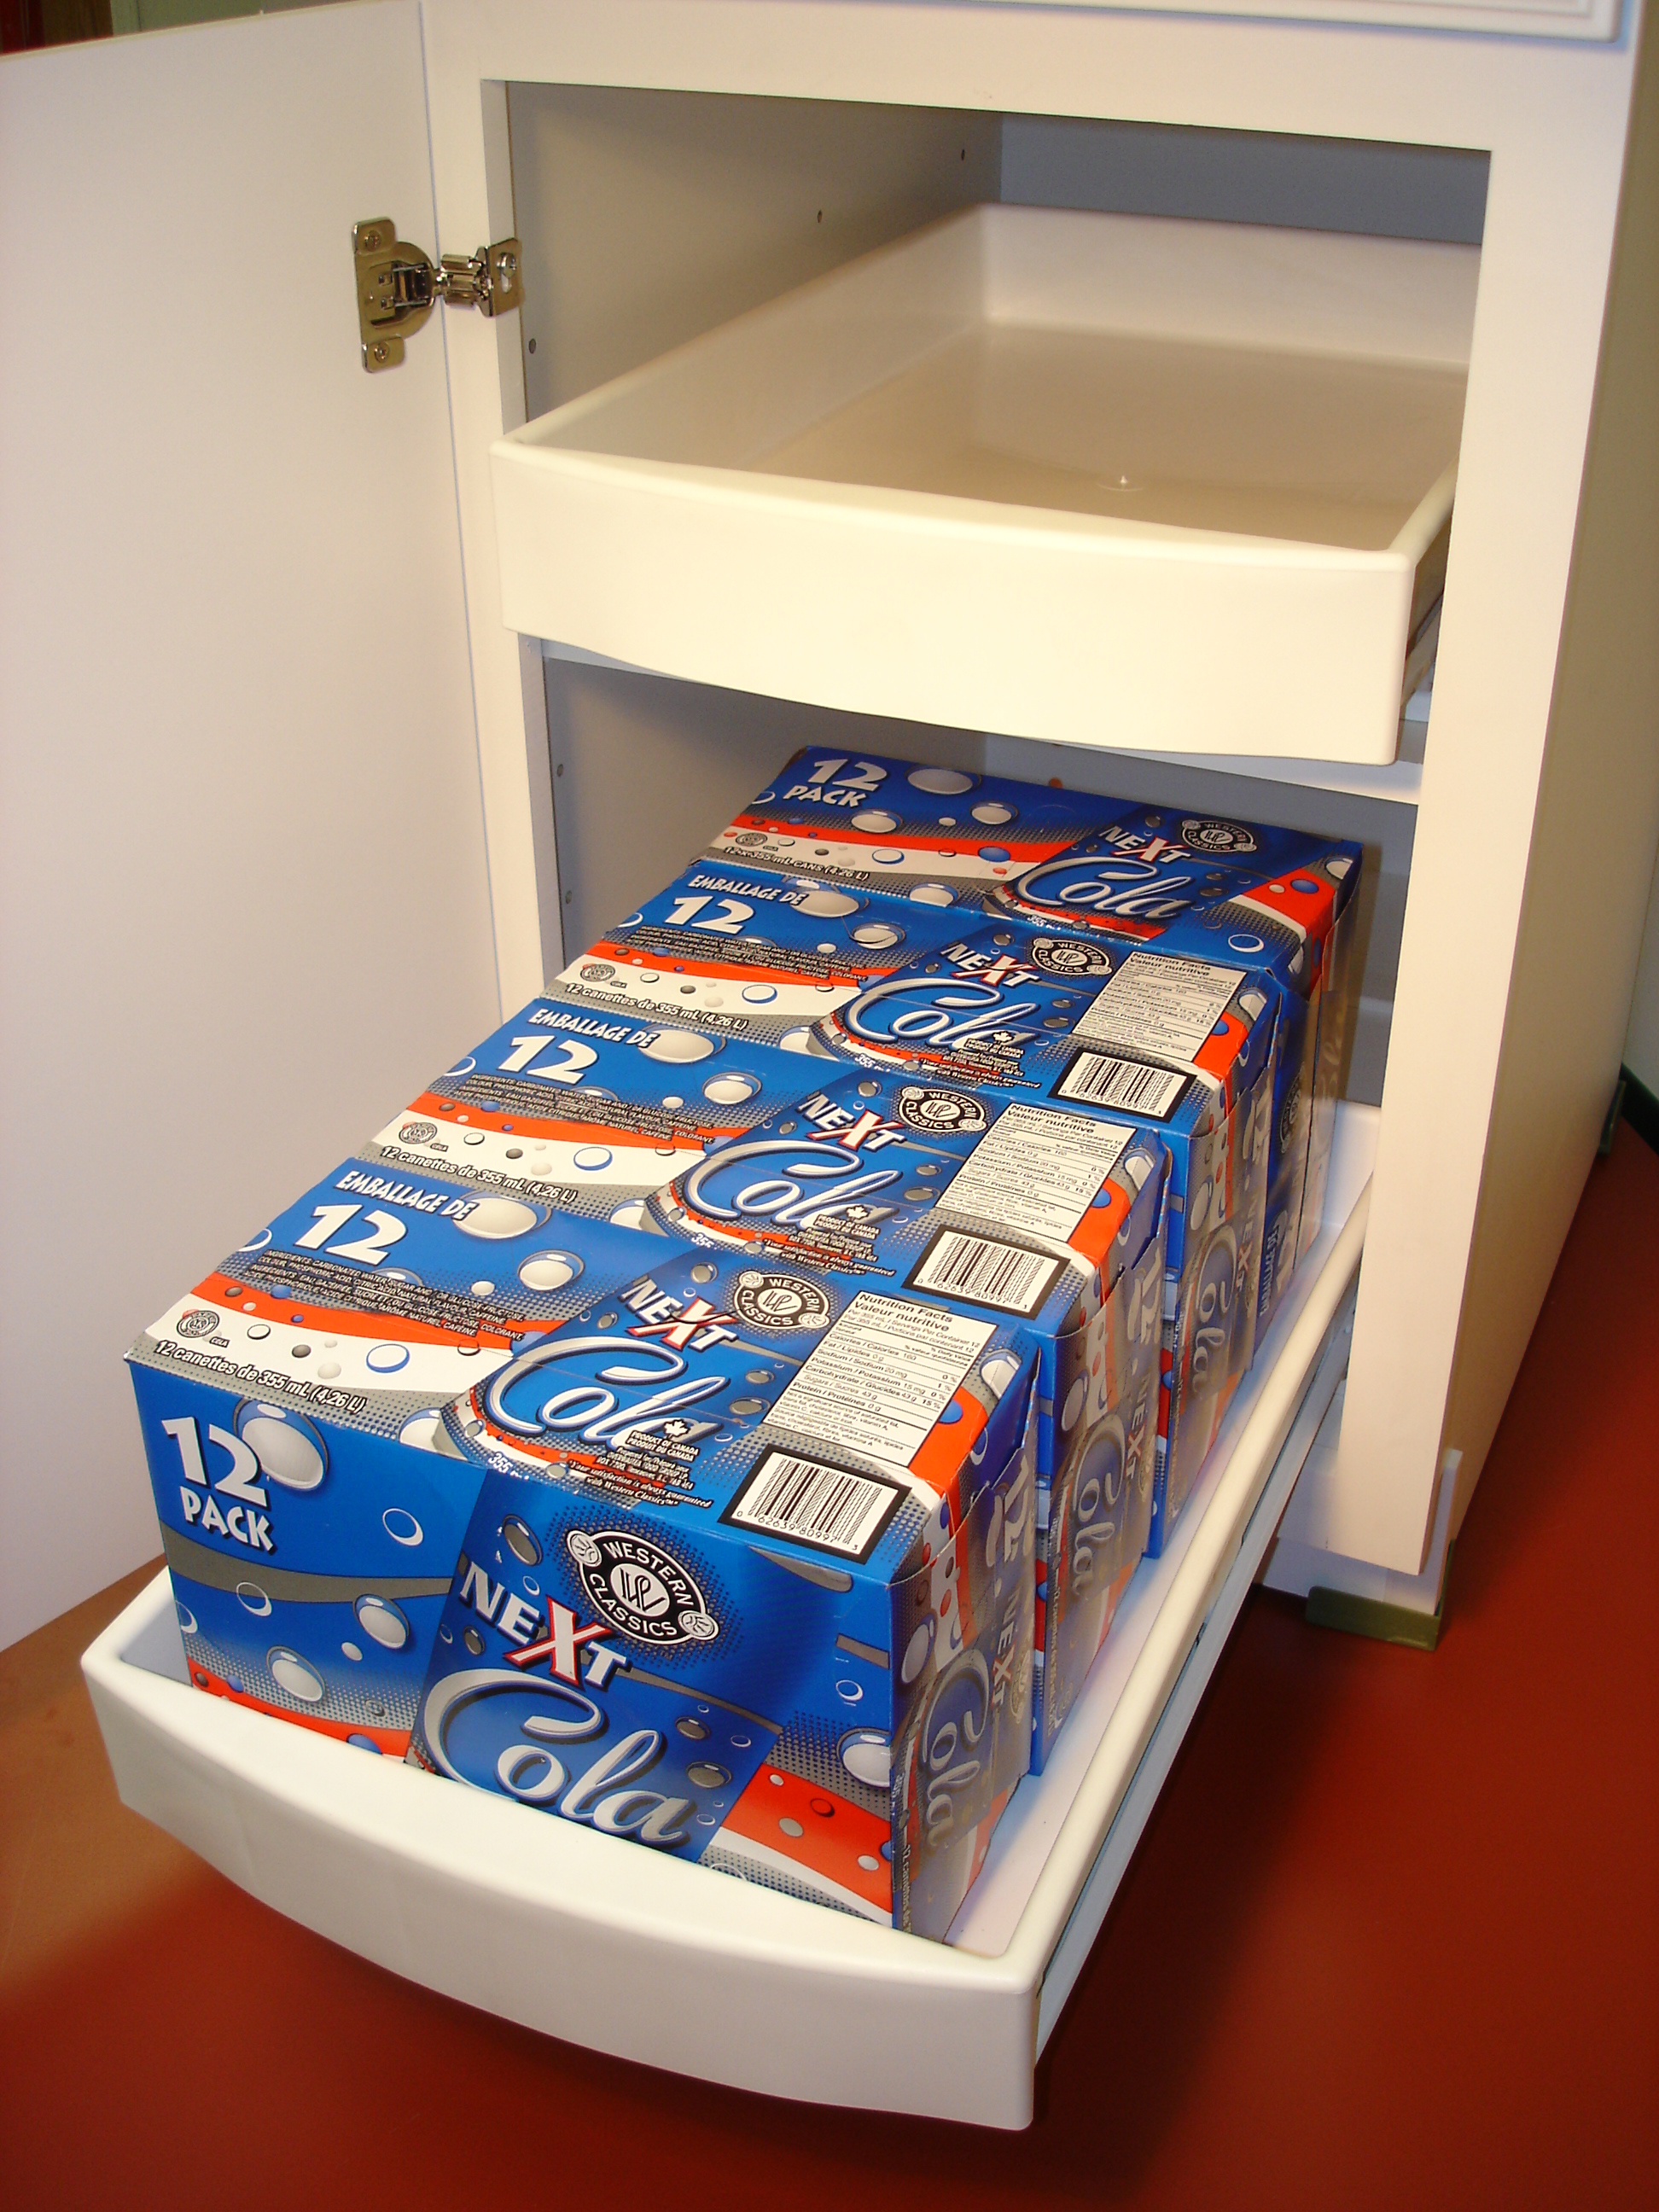
Roll Out Kitchen Drawers has 2 affordable solutions for you.
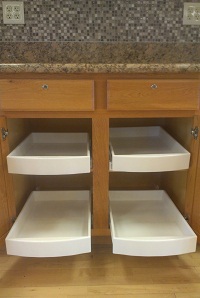
Our Cabinet Drawers
Come FULLY ASSEMBLED and includes FREE SHIPPING within the Lower 48. Screws to any existing cabinet shelf with just 4 screws…so…EASY TO SELF-INSTALL…SAVING YOU MONEY. The issue here is the cost of installation. If you feel you cannot do it yourself and don’t have a relative or friend to do it for you…it could cost a lot to hire someone to do it for you. However, once done, operates just like your knife and fork drawer.
Our Cabinet Shelves
Includes FREE SHIPPING.NO ASSEMBLY, and NO INSTALLATION required. This is basically our drawer basket with felt pads on the bottom…no steel reinforcing…no slides. The drawer basket merely sits on top of any existing cabinet shelf. Yes, you have to hold the front of the drawer when you pull it out…but a really affordable option.
You’ve finally done it bought our drawers and now are about to install them. No drawer is easier to install than ours…but here are some installation tips that will make the job easier.
TIP #1
Separate the drawer from the base…and before you slide it on the shelf, have a look at the center of the white base member. You should see an arrow marking the center of the base. Want your drawer perfectly centered? Measure your opening and put a pencil mark halfway on the front of your cabinet shelf. Match the arrow on the base to the pencil mark…DONE!
TIP #2
Before you slide the base onto your cabinet shelf, notice the 4 pre-drilled screw holes on the front and back base members. These are to help guide your screws. But, first, you should slide the base onto your cabinet shelf…set it back about 2″ from the front of the shelf …align the centering arrow with your pencil mark…and clamp the front base member to the shelf. Then take a sharp short nail…place the nail in each hole and tap it several times with a hammer to break the (melamine) surface. This gives you starter holes for your screws. Leave the base clamped in place.
Note: If your tolerances are very tight, recommend screwing down each hole as you go. Start with one of the front holes…try your best to center the nail in the drill hole…otherwise, when setting the screw, the thickness of the screw will shift the base up to 1/8″ which may cause the drawer to rub when rolled out.
TIP #3
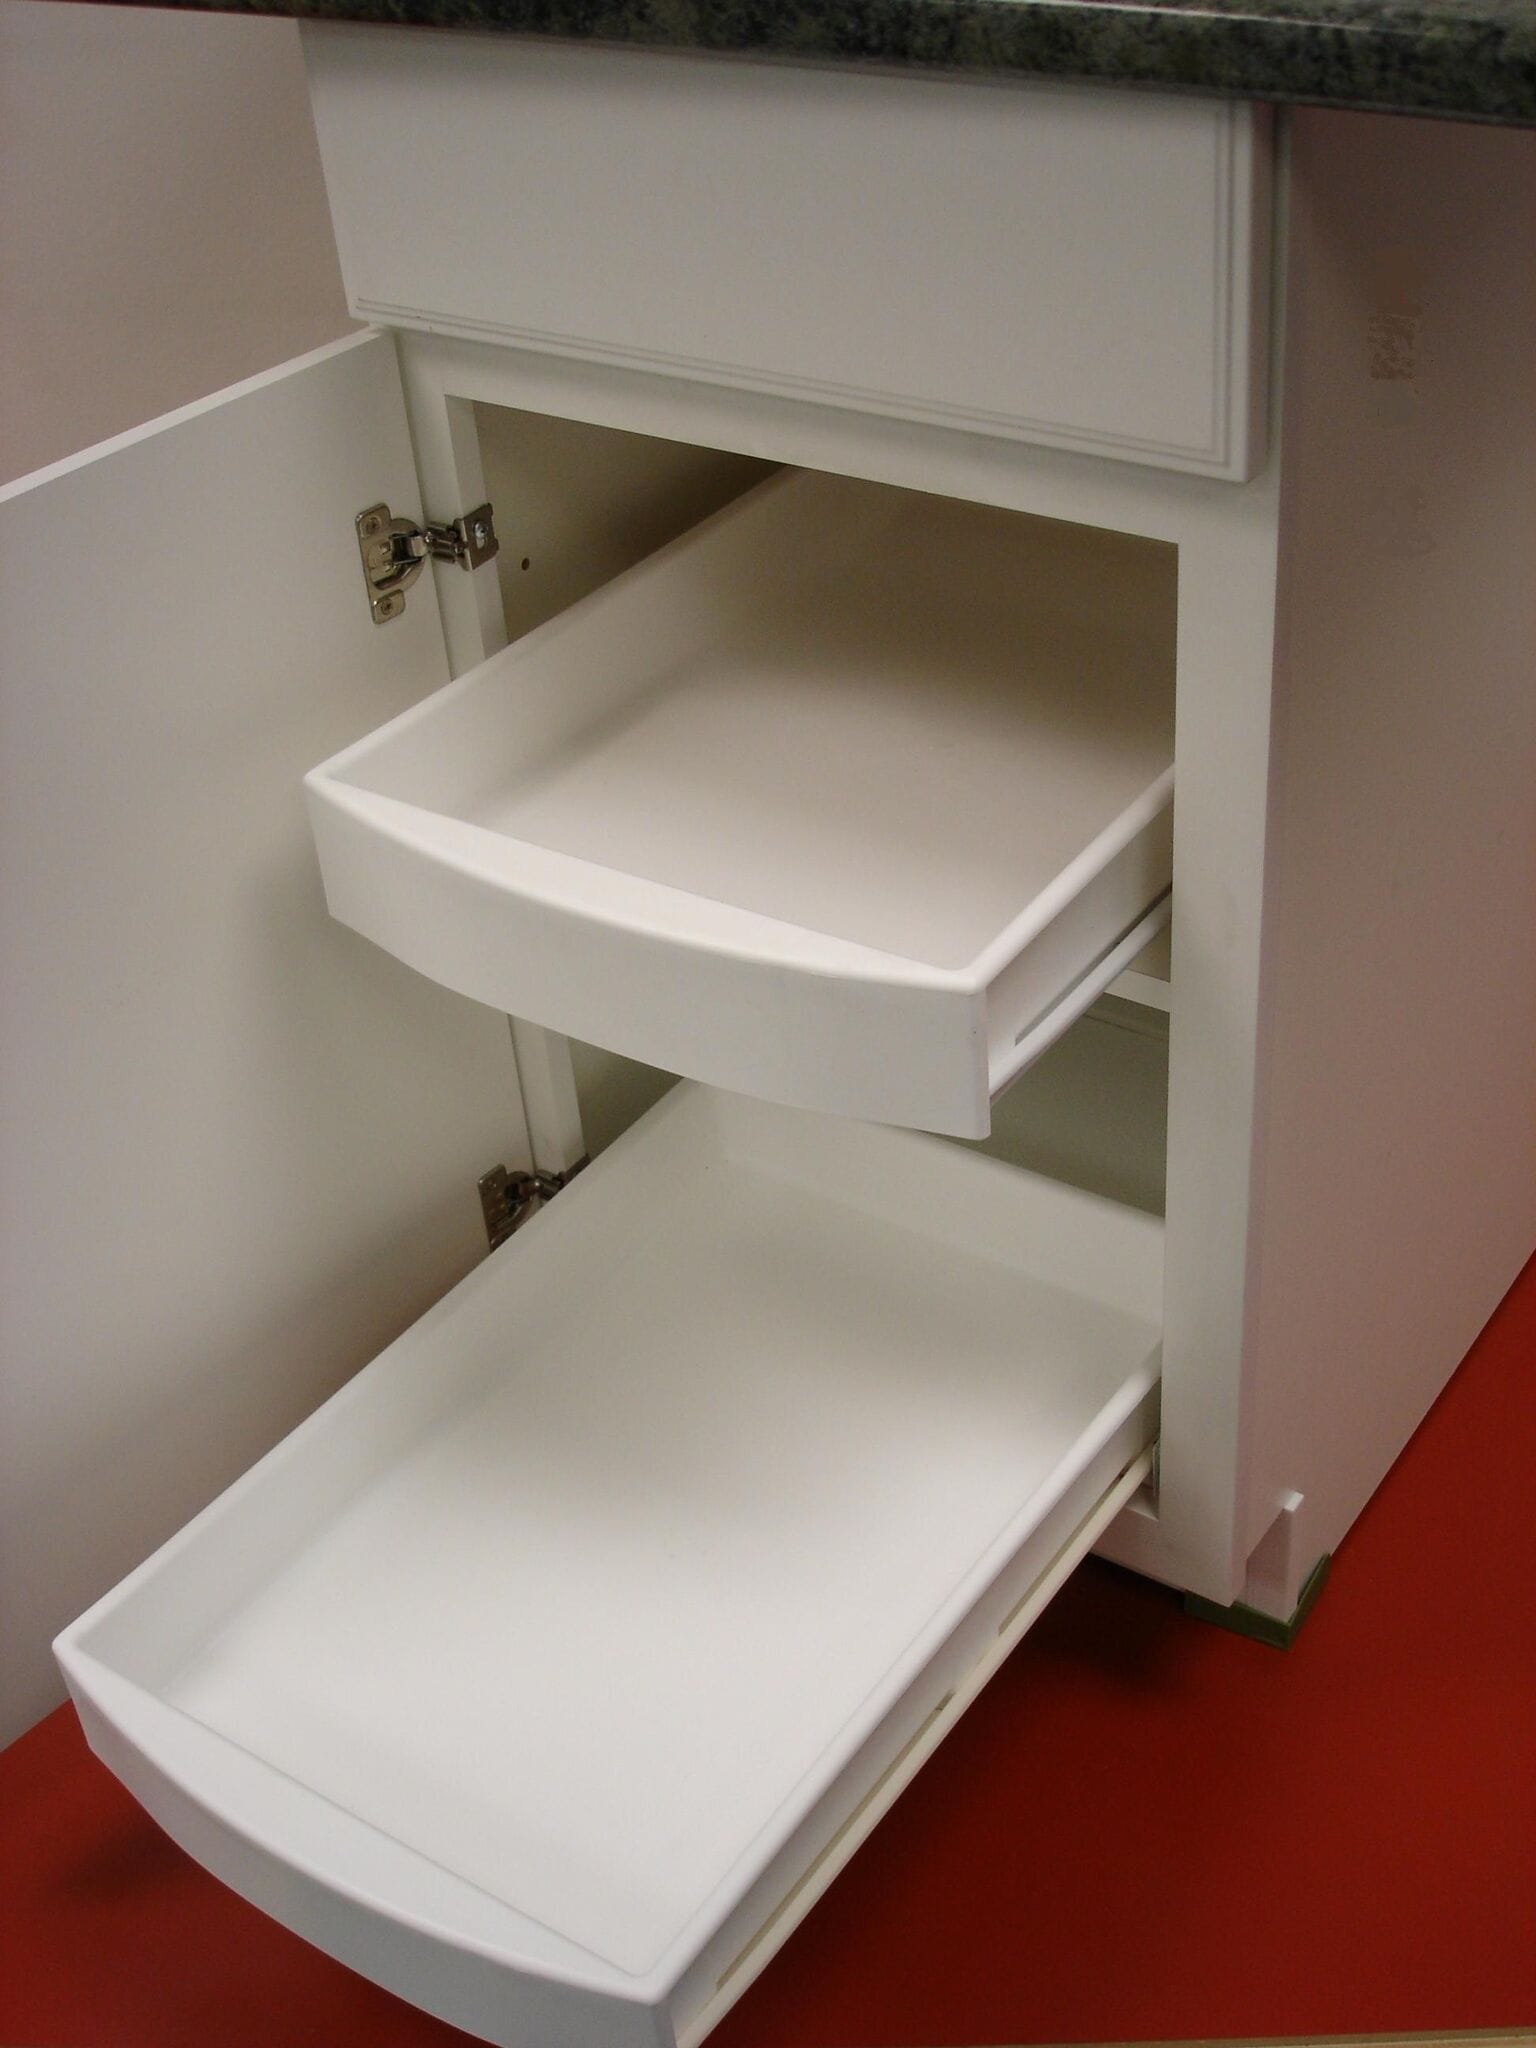
Now you’re ready to drill. Now step back and take a look at your cabinet opening. Look at the bottom shelf…it is the cabinet floor…fixed in place. Now, look at the middle shelf. It is typically placed about 1/2 way up in the opening. The opening is typically about 2′ high, so the middle shelf is typically 1 foot above the bottom shelf leaving about 1 foot of overhead space. The middle shelf can either be fixed in place (often with custom-made cabinets) or adjustable (typically with standard cabinet designs)…sometimes called a “floating” shelf. If your shelf is “floating”, the easiest way to install our drawers is to remove the shelf from the cabinet…place it on the floor…giving lots of overhead room to screw the base to the shelf…and lots of overhead room to do likewise on the bottom shelf. Use an electric drill, corded or portable, its just so much easier.
TIP #4
When a drawer is screwed to a shelf…the drawer is loaded with “stuff”…and then extended out of the cabinet…the drawer acts like a lever on the shelf…pushing down on the front of the shelf…pulling up on the back of the shelf. Thus “floating” shelves have to be secured in place before mounting a drawer on them. When securing a shelf…always attach the securing hardware to the SIDE cabinet walls…not the back cabinet wall. The back cabinet wall of most cabinets is a very thin sheet and will not hold screws adequately.
TIP #5
What if your middle shelf is fixed in place? You can almost always screw in the front 2 screws, no matter the screw, bit, or drill length. The screws we provide are 3/4″ long. If you are using a long bit, and your drill body is quite long, you may not be able to get the drill vertical in order to place the back screws. Our first recommendation is to look for a short bit. Bits can be as short as 2 inches…where an inch goes in the chuck…so only an inch is added to the length of your drill.
TIP #6
But let’s assume you are faced with a shelf that is high…allowing only 6 inches of overhead space. No way you are going to get a regular drill in there. Get a right-angle drill. Nowadays, the Home Depot/Lowes, etc carry right angle adapters for standard drills…at fairly reasonable prices. Here is a couple we’ve found:
I wanted to share a personal experience from a client who is over-joyed over their new pull out pantry drawers or kitchen drawers that they bought from Roll Out Kitchen Drawers.
“Let me tell you, I am not the most organized person in the world but I try hard on a daily basis to keep the house organized. I work and care for a family so my days right now are full with meetings, lessons, and keeping the family fed and house clean. Like any mom, I try hard to juggle all the activities.
I found Rollout kitchen drawers at the same time that I desperately needed to organize some kitchen items. I like to cook and I am constantly looking for that one spice, or sugar, or particular flour, or random ingredient that I need now but I can’t find.
It literally slows my dinner prep down to a halt while I reach back in search of that item.
Honestly, I have had to go get a flashlight to see at the back a cupboard to find that one ingredient I know I have but I can’t find. You may have experienced this too. It is frustrating and time-consuming. I am simply amazed and pleased by the quality of this roll out shelf. It rolls out so smoothly and can handle the weight of almost 50 pounds.
I would definitely recommend these pull out drawers to your friends and family. It would also make a great gift idea to your mother, aunt, nana, or mother in law or the best cook in your family.
I also found that the sliding shelves are very handy in the sub floor of my RV. The pull out pantry drawers and pull out kitchen drawers conveniently hold soup cans, bulk laundry detergent, and items that I do not use every day but still need a place to store them.”
Use the Pull Out Pantry Drawers or Pull Out Kitchen Drawers for RV Storage Trays Too
Learn how storage trays or slide out trays might work for you in your travel trailer or RV. Watch the video to see how to secure RV slide out shelves when you travel.
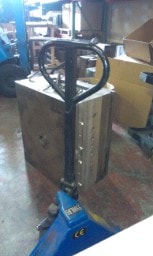
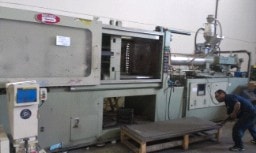
Our under cabinet sliding shelves are made from large steel/aluminum molds. They are roughly 6” larger in every dimension than the drawer itself. The molds for sliding shelves are made with the aid of a CAD (computer-aided-design) system. This is basically, a computer that is loaded with our under cabinet drawers blueprints and it directs another machine to carve our mold from a solid block of steel/aluminum.
The whole process is controlled by a highly trained CAD technician. The cost of each under cabinet sliding shelves mold is significant. It costs roughly the price of a new car. Roll out Kitchen Drawers pays for the mold before we sell a single drawer. Should we guess wrong on the potential sales, we will never recover our investment cost. So we plan carefully to meet both our business and customer needs.
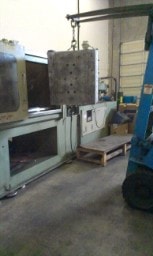
(See one of our molds behind the blue pallet jack in the picture to the right)
NEXT WE NEED AN INJECTION MACHINE
So, how are the molds used to make the plastic drawer you see on our website?
Answer. We give the molds to a Contractor who owns enormous manufacturing machines that the molds can be put into. Our current Contractor is Titan Manufacturing out of Port Coquitlam, BC. This is a suburb of Vancouver, BC. Titan buys large boxes of plastic pellets and each box of pellets can make roughly 500 drawers.
(Notice the man beside the injection machine in the picture to the right)
The pellets are fed into a large hopper (funnel) that feeds the pellets into an injection machine where they are heated to the melting point. The injection machine forces the molten plastic into the mold at 400-600 tons of pressure to ensure the molten plastic gets into the smallest little nook and cranny of the mold. This process takes about a minute. The mold is then opened and hot new under cabinet sliding shelf drawer pops out. The mold closes and the process repeats.
After the hot under cabinet drawer pops out, it is placed on a cooling form for a few minutes that holds the drawer shape to ensure no deformity while cooling. Obviously this is not for one of a kind or small runs. When we re-stock a size, we usually run about 500 under cabinet sliding shelves of that size.
(Here is a picture of one of the molds being placed in an injection machine by the blue fork lift).
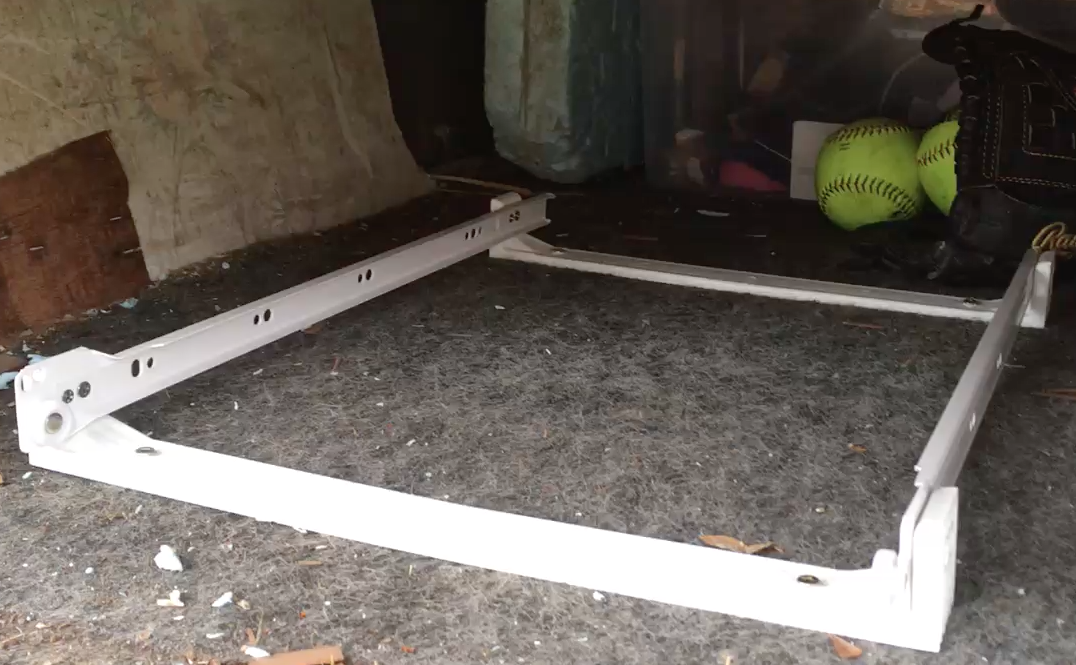
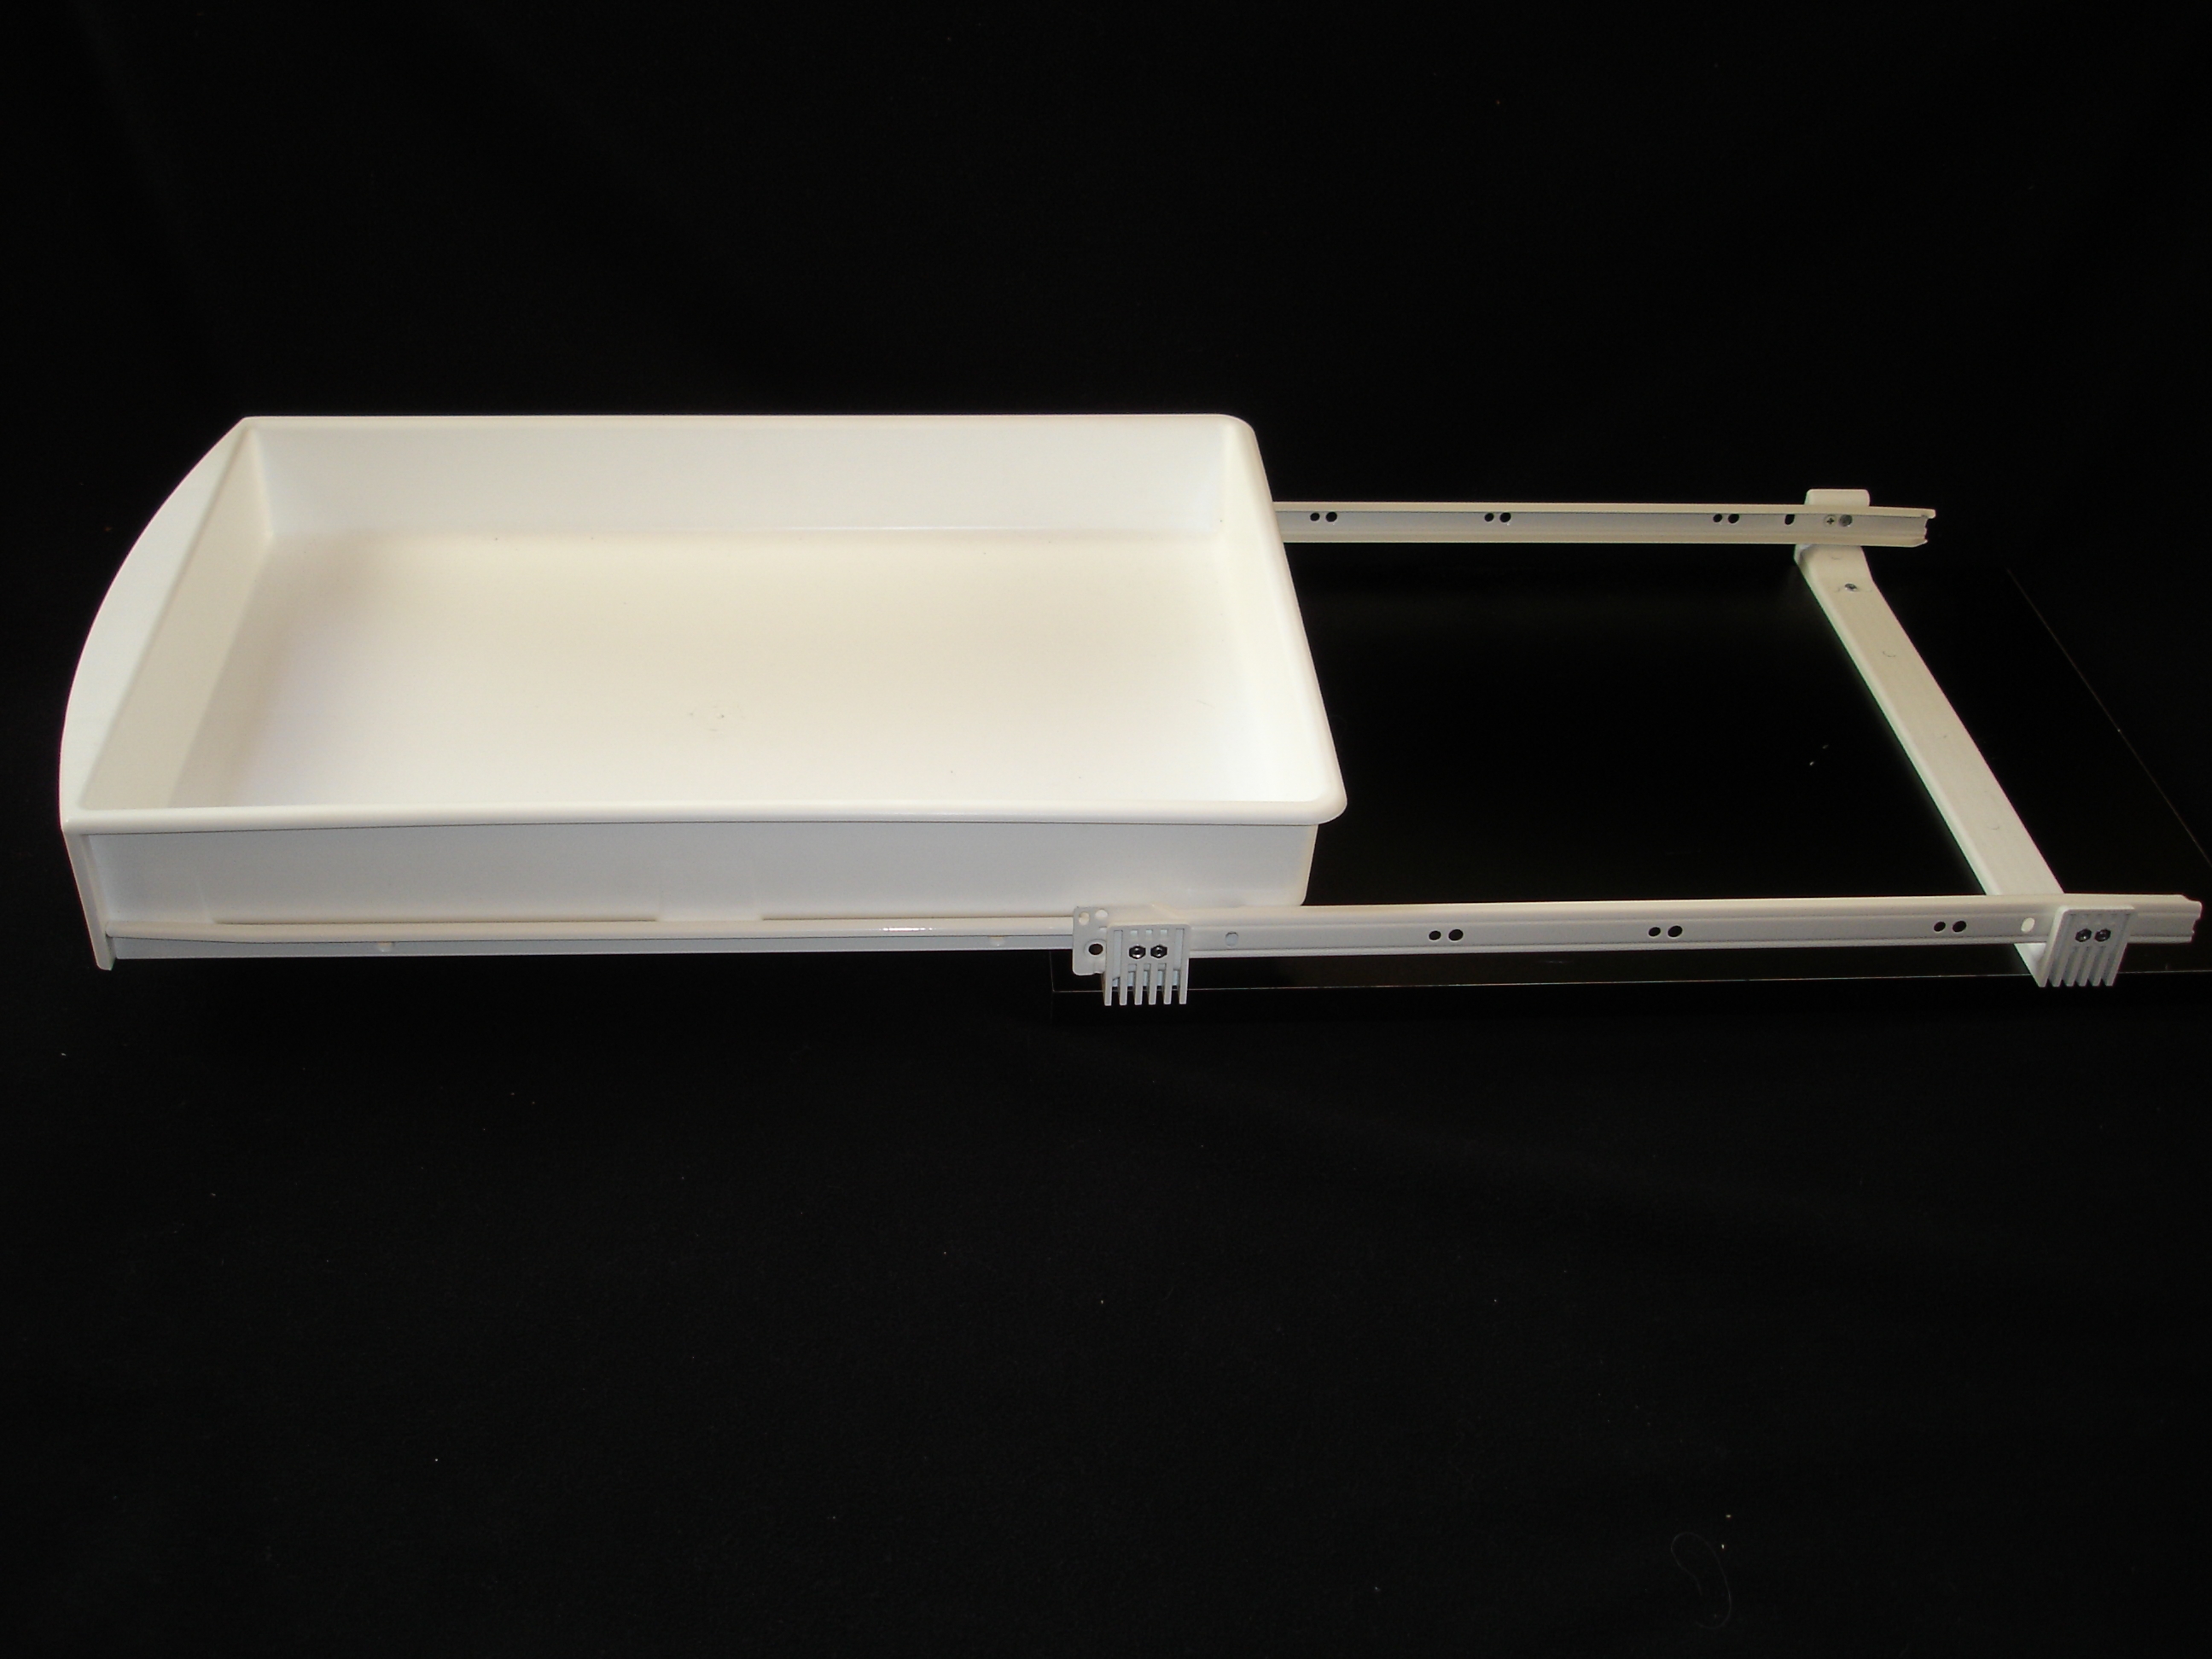
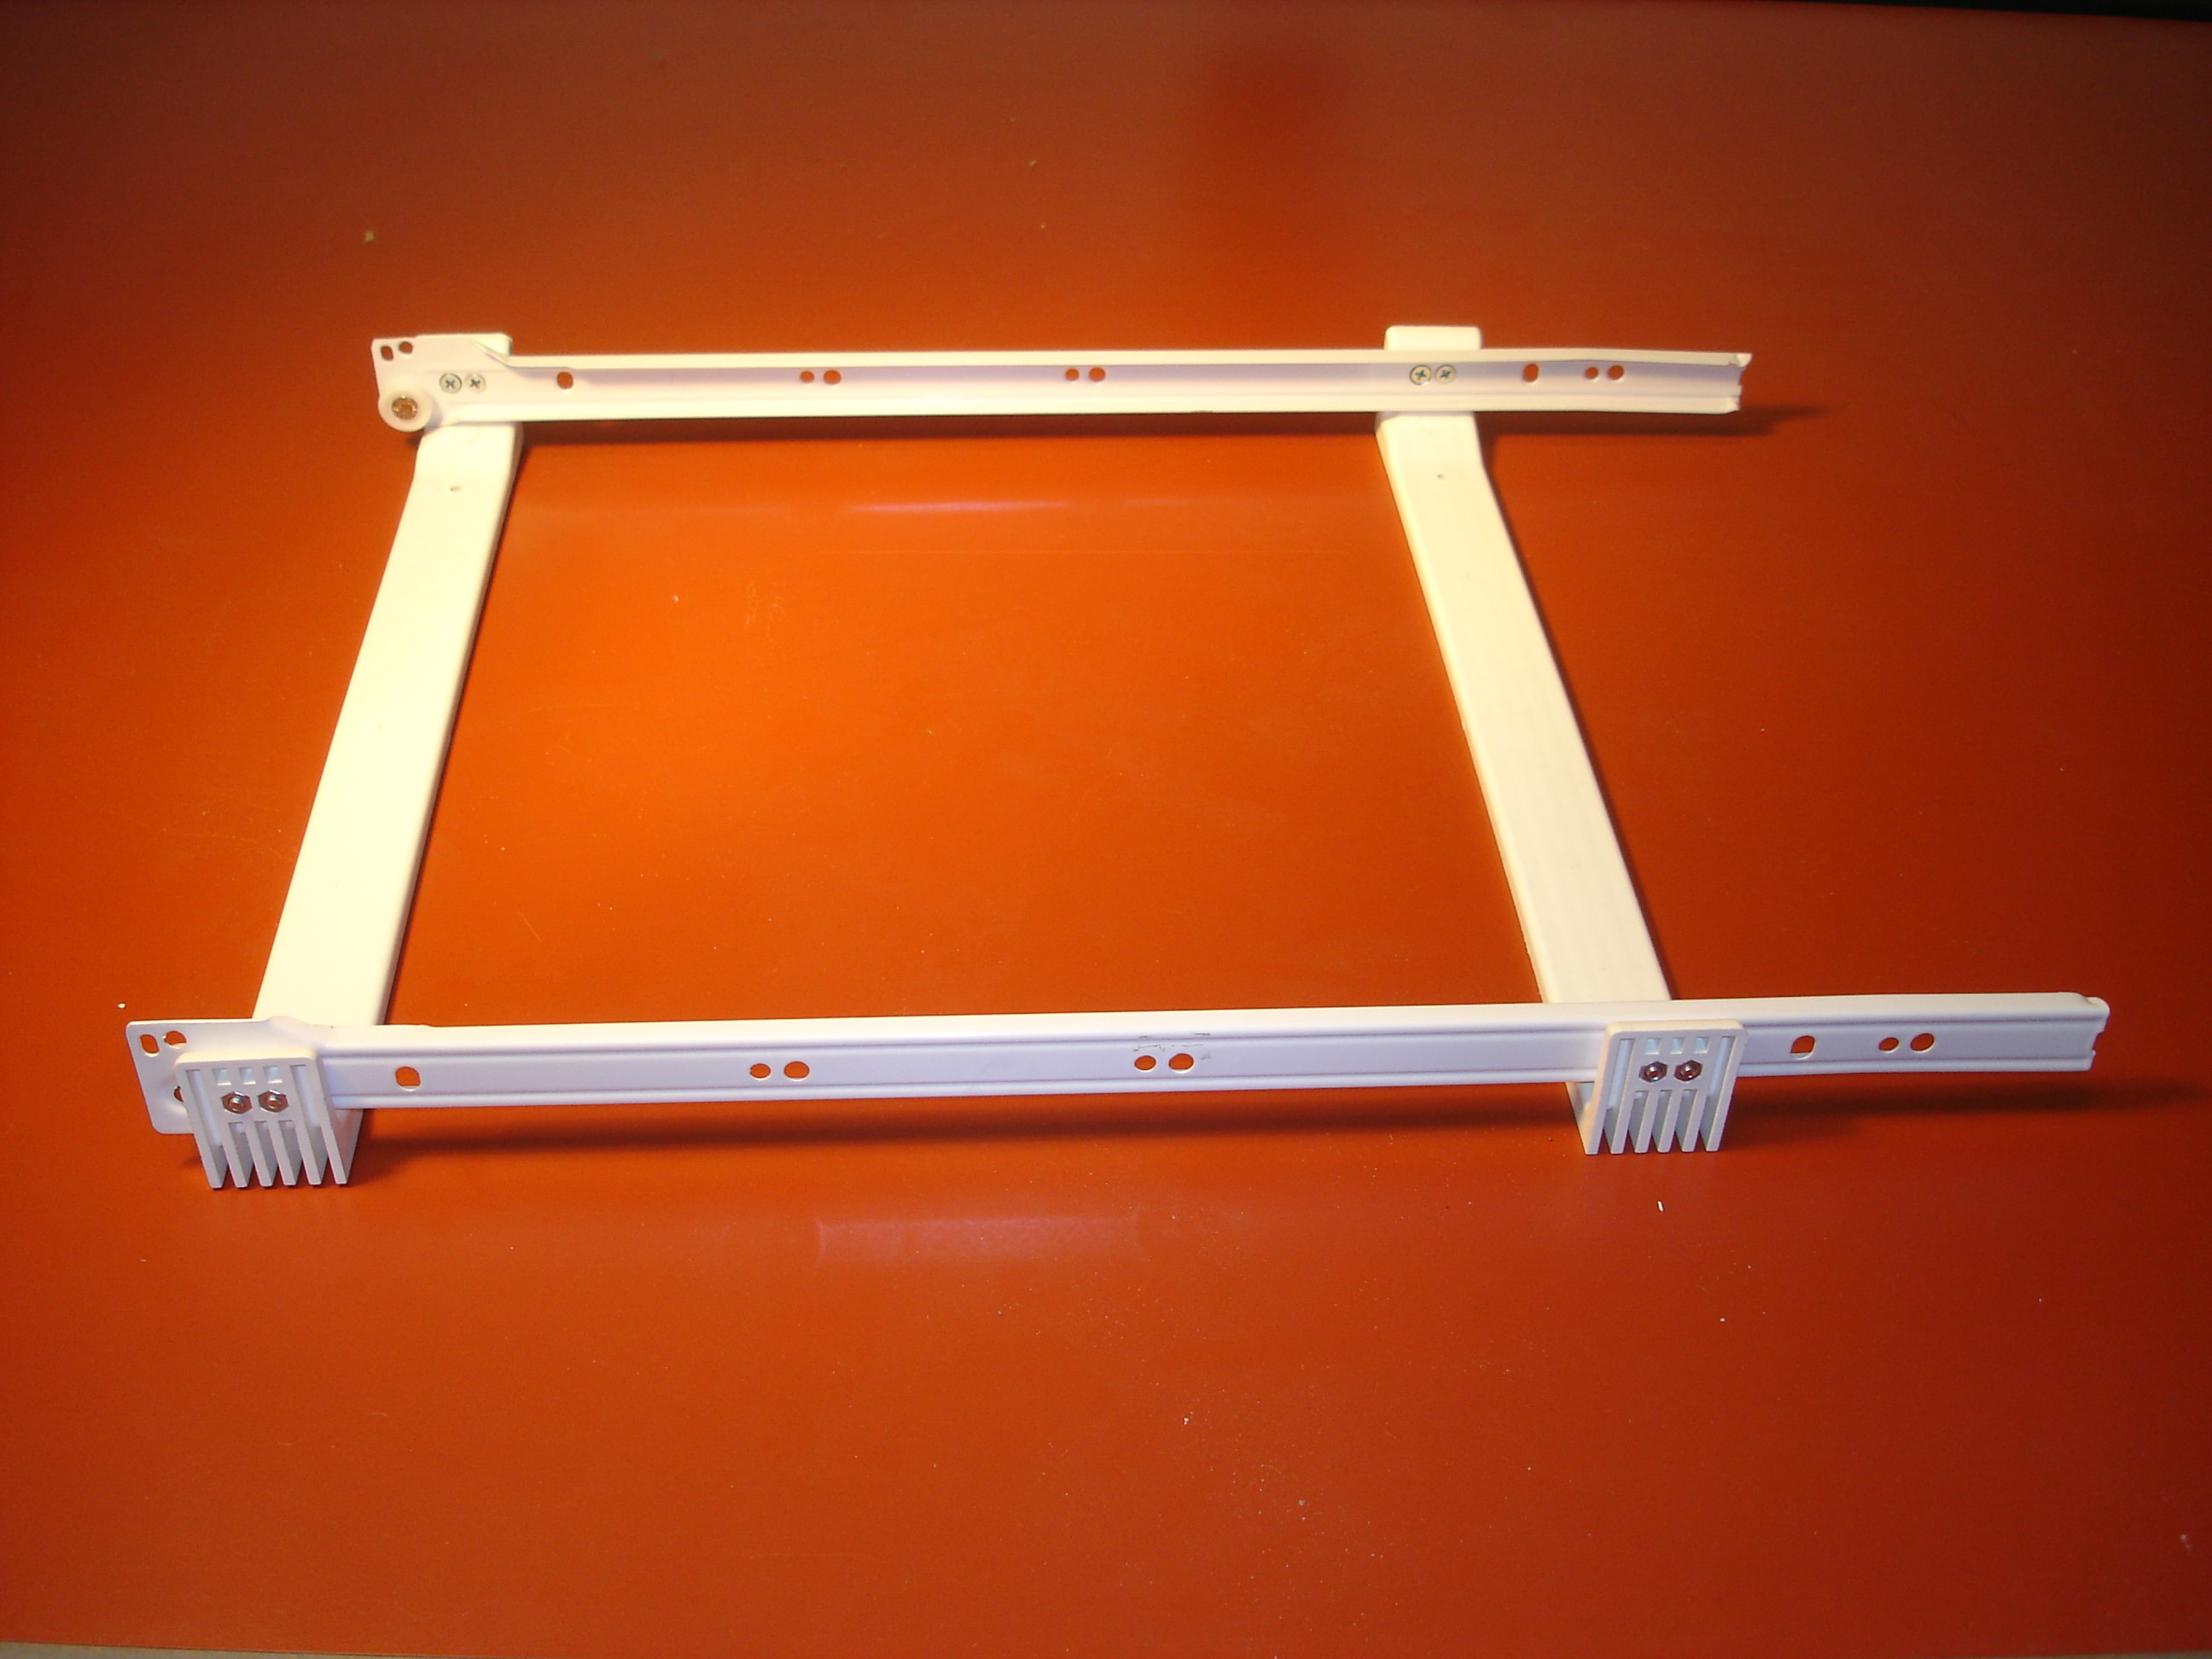
After cooling, the under cabinet drawers are crated and shipped to our warehouse in Blaine WA, where they are assembled. Steel cross-support and rails are added to the drawers. The outer rails are attached to the base member. Here is an example image of the pre-assembled sliding shelf.
After assembly, the sliding shelves are boxed for shipment. We usually ship 2 drawers of the same to a box as this completes a kitchen base cabinet position. But we also box some drawers individually to service uneven number orders. Our shipper will usually have roughly 50 of a size pre-boxed and ready for shipment in inventory at any given time.
Kitchen Organization is a must. Since the kitchen is the main hub of most homes it is essential that the items in your kitchen are easy to find, reach and grab on the go. The use of a kitchen pull out shelves can be a very valuable tool and a quick time saver.
Improving your kitchen organization is easy than you think
It is always an inconvenient problem reaching back into the dark areas of your cupboard for that one item that you desperately need now to finish off your meal. Stretching and fumbling around items in your cupboard is not fun. Most of us have all been there down on our hands and knees reaching in the dark depths of our cupboards, muttering away at ourselves that there must be an easier way.
The convenience of kitchen rollout shelves eliminate these frustrating times. But, the search for the right kitchen roll out shelves can be a daunting task since there are so many different kinds.
Which kitchen pullout shelves work well with my personal style?
Carpenters can build you pull out shelves but they will be costly. You need to pay for the labor and materials to have them installed. If the convenience of the pull out shelves is more important to you than the custom look that few people will see anyways, then the DIY approach can save you big money. All you need is an electric drill or screwdriver.
When searching for the right pull out shelves to buy, things to consider are:
What items will you be using on the shelf?
Which roll out kitchen shelves will work the best for your heavy or larger items?
Which shelves are easiest to install?
How durable is the shelf?
Save Money and time- install your own durable kitchen pullout shelves
Before you purchase your kitchen pullout shelves look for ones that:
are pre-assembled
are pre-aligned
have sturdy construction
are easy to install (screw to cabinet shelf…not cabinet walls)
All you have to do is clear out your cupboards then and screw the whole pullout shelf into the cupboard shelf. Be sure to choose pre-assembled kitchen pullout shelves that look like this.
The advantage of buying a Made in the USA product is that you are buying quality made roll out cabinet shelves with excellent customer service
All of us are guilty of trying to maximize the amount of “stuff” we jam into kitchen pullout drawers, after all it’s only human nature. This is OK if the “stuff” is ligh in weight but if the “stuff” is heavy, there are a couple of engineering principles to think about when using your kitchen pullout shelves.
Kitchen Pullout Drawers Test results
1. When you extend kitchen pullout drawers out, the pullout drawer acts like a lever. Think of the lever as a teeter-totter. The pivot point is the front of your cabinet shelf. One seat is the back of your cabinet shelf while the other seat is the front of your kitchen pullout shelf. When extended, if you have 50 lbs in your kitchen pullout drawers then there is 50 lbs. pulling up on the back attachment point to the cabinet walls or the back of a cabinet shelf.
2. There is more than one way a kitchen pullout drawers can fail. We have tested our kitchen pullout shelves when extended to 100 lbs. In that test, the kitchen pullout shelf was screwed into a new sheet of 3/4”plywood. On other tests that were screwed into actual under cabinet drawers (melamine), the drawer failed around 70 lbs. becaus it pulled plugs of wood out of the back 2 base screw holes or it pulled the secured ‘L’ bracket shelf screws out. So, what failed was the base shelf or the back of the cabinet not the kitchen pullout shelves.
Thus, we recommend loading kitchen pullout drawers to no more than about 40-50 lbs.
A heavy weight in a kitchen pullout shelf is similar to having someone toss that weight at you. Imagine someone from 3’ away throwing a 50 lb bag of flour toward you. That is the energy involved.
Now you know, kitchen pullout shelves can fail in several ways. But, no matter how they fail you are on the receiving end of that weight and you don’t want to be in that position. Simply avoid loading any single kitchen pullout shelves to more than about 40-50 lbs. Spread the weight around and re-organize your heavy items to not overload any one kitchen pullout drawers to maintain an orderly drawer and avoid shelf damage.
This is a pre assembled pullout drawer. Learn how to measure for a pullout drawer.
You finally decided to do it. You’re going to retrofit your existing kitchen cabinets, and pantry, with pullout kitchen drawers and you’ve going to do the installation yourself. Your partner says BRAVO! but your mind goes back to previous DIY installation disasters. You remember the multi-page manuals in 6 different languages and the poor English. The soft metal bolts easily ruined if cross-threaded. You hope this is NOT going to be one of those experiences again. Let me assure you it is not. Here are 5 reasons why nothing installs easier than our slide out kitchen drawers to install.
1. YOU ARE ATTACHING PULL OUT DRAWERS TO THE SHELF NOT THE CABINET WALLS
Drawer slides come in 2 sets. Normally, one set is attached to the drawer and the other set attaches to the cabinet walls. The pull out drawer width is carefully set to allow the drawer rails to tightly interlock with the cabinet wall rails.
Problems can arise if the pull out drawer width is too wide, the drawer will bind and is too loose, the pull-out drawer will pop out under the load. Attaching sliding pullout drawer rails to cabinet walls in existing cabinets is tough especially if the cabinet has a fixed middle shelf.
You will only have a foot of space to work in. Usually, at least one or both of the rails have spacers to hold the rail away from the cabinet wall to allow the sliding drawer to clear some obstruction like a door hinge. The option here when working with a cabinet wall is to break out the fixed shelf. Now you have more room to work with but the inside of your cabinet looks a mess.
Our roll out drawer design eliminates both of these problems and makes the installation of pull out shelves in any existing cabinet so much easier.
2. OUR SINGLE UNIT BASE PULLOUT KITCHEN DRAWER DESIGN
To overcome, the above cabinet wall installation issues, we designed a base unit to hold the cabinet rails. This allows the pullout shelf to be screwed to the interior shelf instead of the cabinet walls. We attach the cabinet rails to the base, the base is a single unit, and it is sold as pre-assembled. All you have to do is slide the base onto a shelf and screw the base to the shelf with the 4 provided screws. Installation done!
We attach the cabinet rails to the base, the base is a single unit, and it is sold as pre-assembled. All you have to do is slide the base onto a shelf and screw the base to the shelf with the 4 provided screws. Installation done!
3. OUR CENTERING GUIDE
Another little detail that is not easy to see is the centering guide on competitor roll out shelves. In the center of each base cross member is an arrow. Simply mark your shelf where you want the middle of the drawer to sit and then match the arrow to the mark.
4. OUR PRE-DRILLED HOLES IN THE BASE
Again, another little detail designed to make installation as easy as possible is the pre-drilled holes in our base unit. Guess what they hold a screw upright. When you want to install the back screws in particular, just place both in the pre-drilled holes, slide the roll-out drawer base back into position and the screws are sitting there waiting to be drilled.
5. EVERYTHING ASSEMBLED & PRE-ALIGNED
Not only do we attach the cabinet rails to the base, we attached the drawer rails to the pull out drawer. The width of our pullout kitchen drawers, and the width of our base unit are designed so the inner and outer rails interlock perfectly. Everything is not only assembled but pre-aligned.
Some of our competitors provide 4 separate ‘L’ angles as a base unit. Essentially what you have to do is both the assembly and alignment. This mean that YOU attach the cabinet rails to the ‘L’ angles. And YOU have to attach one side and fix it in place. YOU then place the other side in roughly the right spot (there are slots in the ‘L’ angles, so YOU can adjust to the final position).
Then YOU put the drawer in the base and move the base into where the drawer seems to slide easily. YOU remove the drawer carefully so the rails don’t move. Finally, YOU screw down the ‘L’ angles in the final position. If YOU get anything wrong like; the rails too tight, rails too loose then guess what? YOU repeat until YOU get it right.
Save on time, effort and frustration with the Roll Out Kitchen Drawers patented design, With our design, YOU don’t have to worry about any of these problems above. We’ve done everything possible to make our pullout kitchen drawer as easy as possible to install. We applied for a US Patent on our design and were awarded a patent. If you look carefully underneath the front of our drawer you will see the number…6,659,576 B1.
Watch the video to learn how easy it is to install pullout kitchen drawers
Whether in a bathroom vanity, under the sink cupboard, a kitchen cabinet, or a kitchen pantry there are 3 basic rules that can be applied when organizing your drawers and cupboards. These three basic rules are good to follow when looking for optimal pantry organization.
Following the below rules will keep your kitchen pantry organized and simple to manage. Utilizing slide out pantry drawers are the easiest way to ensure you have a flexible pantry cabinet pull out system that you can turn to at any time.
3 rules for pantry organization
• Place only similar stuff on the shelf
• Place taller items at the back of the drawer and shorter items at the front
• Place the most used items at the easiest accessible location
Let’s look deeper into the reasoning of these pantry organization rules
Similar stuff in a drawer
The whole point of organizing is so you can find your stuff quicker and easier. When you need it you can go to the right spot and immediately find it. The goal is to eliminate the frustration of emptying out your cupboard in search of that one item that you desperately need now.
Find it when you want it. A simple example for how effective the right drawers can be for you is to have all your spices in one place or more than 1 drawer if you are an avid cook or baker.
Place all your utensils in another drawer or drawers close together for easy access. And place all your pots & pans in the same place. Nothing is more frustrating than looking for a top to your pot when you are cooking dinner for the family or panicking to find the only utensil to scrape out the bowl properly after you mixed up a recipe. Place tall items at the backs and short items at the front
This pantry organization tip simply allows you to see and access items easier. You can see everything in the drawer and easily lift the tall items over the short items. This will alleviate the frustration of knocking over taller items in the front to reach for something in the back also. Save time by placing the larger and taller items at the back.
Most used at the most accessible location
In a kitchen cabinet, this means putting the most used items on the top shelf. In a cupboard pantry, this means putting the most used items in the middle shelves, from eye level to roughly waist height. Put the heavy items at the bottom of the shelf and the light items on the upper shelves.
Following these 3 simple pantry organization rules to help your pantry cupboards be efficient
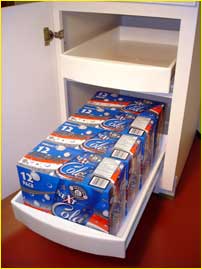
These pull out drawers help with pantry organization immensely
Have you seen these easy to install pull out drawer yet? Designers install pullout kitchen drawers to enhance the look of kitchen and pantry drawers now. Slide out kitchen drawers are a perfect way to update an older kitchen.
You can pay $1000’s of dollars for a carpenter to install custom pull out drawers or you can install these nifty pantry organization pull out drawers yourself. In less than an hour, have convenient
Pull out kitchen drawers can easily be installed with a screwdriver in your pantry, bathroom cabinet, storage cupboard, under the sink cupboards, garage, RV, and anywhere else that you have storage needs.
Everyone is familiar with a child’s playground slide. The slide material is either plastic or aluminum. The child easily slides down because the slide is elevated on one end (gravity)…and the low level of friction between the clothes (often denim) the child is wearing and the slide material.
Cabinet drawers are similar, but installed perfectly level, so there is no gravity advantage. Let’s quickly look at the drawer slide options available.
In the beginning…
I suspect some of you have seen older dresser drawers that were made of wood and had wooden tracks the drawers slid on, often lubricated with paraffin…or more recently the plastic stack of 3 or 4 drawers, where the plastic drawer slides on plastic tracks. These are rudimentary. The problem being…the more weight you put in the drawer…the more friction between the drawer and the tracks…thus, the harder to move the drawer…in or out.
The Old Standby…
There may have been earlier models, but around the 1960’s, the modern drawer slide came into common use. These designs are all ¾ extension. For a discussion on that see this page https://www.rolloutkitchendrawers.com/why-34-extension-slides/ on our website. If you pull out your knife and fork drawer, it is likely that style of slide. A slide package comes as 2 sets…an inner set, that screws to the drawer…and an outer set, that screws to the cabinet wall. The slides are metal tracks with a nylon coated roller on one end. This invention took friction out of the equation. You can load these drawers heavily, and they still glide easily. Thus the term “rollout”, or “roll out”, drawer.
One point of note. As the inner (on the drawer) and outer (on the cabinet walls) set of slides have to interlock to function properly, the width of the drawer has to be made to precise tolerances. This is easy to do when the cabinets come from the factory equipped with rollouts. Alas, many cabinets come today with just 2 shelves behind a cabinet door. When trying to convert an existing cabinet that originally came with shelves, you have to consider the opening of the door and the thickness of the door hinges. The drawer has to be able to roll out past any obstructions. This means the drawer width must be quite a bit narrower than the cabinet walls. This creates a problem because the slide set attached to the drawer do not interlock with the slide set attached to the cabinet walls. The solution is to move the outer set of slides towards the inner set of slides using spacers attached to the cabinet walls…of just the right thickness to interlock the drawer slides. This can be challenging at times. Another option…the one we chose…is to attach the outer rails to an existing shelf. We designed a ‘U’ shaped base member to which the outer slides are attached such that the whole assembly could be screwed to the shelf. We ship our base member fully assembled…so all you have to do is place 4 screws into a shelf to complete the installation.
A Later Feature…
Later, full extension slides were developed. These combine the inner and outer slides into a single unit with ball bearings between the 2 slides. Full extension slides are typically more difficult to remove the drawer from the cabinet than the ¾ extension style slide…and roughly twice as expensive at this point. Personal opinion…they do not roll as easily as the ¾ extension…but are robust, carry a lot of weight, and extend the drawer out fully.
The Latest Feature…
Soft Close/Open. These are sophisticated engineered products at a premium price. Tap to open…tap to close. Targeted for the high end of the market.
A Word About Slide Orientation
When you look at a bunch of different drawers, you will see some with the slides mounted horizontally on the bottom of the drawer. Imagine driving your car on 2×4’s over a ravine. What would hold more weight and flex less…a flat 2×4…or a vertical 2×4? Vertical, of course…you have 4” of thickness vs 2” of thickness. Same applies to drawer slides. Enough said.
If you have any slide questions, drop me a line…I’ll be happy to answer them.
Pull out cabinet drawers are typically made from 3 materials…wood, metal, and plastic. Let’s look at the pros & cons of each material.
Firstwood. Here wood includes all the various hardwoods, softwoods, bamboo, and even the glued woods…plywood, and glued sawdust…melamine. The materials are readily available…they come in a variety of grains, color, hardness, and can be joined and carved in different ways. All this, and the ease with which wood can be cut to any given dimension, allows a high degree of relatively inexpensive customization. If you want a really tight fit, custom wood is the way to go. The main con of wood…it is the most prone to water damage. If damaged…it typically is not fixable…throw it out…and try to replace it.
Metal drawers are either solid metal, or, wire mesh. The mesh is either rubber or chrome coated. Metal is the hardest of the materials, and expensive to shape…thus expensive to customize. Virtually all product comes in standard sizes….which for the homeowner means you may have to accept a less than ideal fit. Solid metal drawers are typically built for industrial (tool box cabinets) and commercial (filing cabinets) applications. For kitchen applications, the only solid metal drawer I am aware of is the Blum Metabox line which requires assembly prior to installation and is quite pricey. Rubber coated wire baskets are typically designed and priced for the low end of the market, and most would agree, do not have a reputation for quality. Chrome coated wire mesh baskets are classy and durable…typically come with full extension rails…and are relatively affordable. The only con with chrome wire mesh drawers is the basket contains nothing smaller than the mesh dimension, so thin objects can protrude out the side and potentially jam the drawer and certainly no dust, lint, or water is contained.
Finally, plastic. Plastic drawers are like steel drawers, in that, for typical kitchen applications, they are not suitable for custom work…thus only standard sizes are available. ( You could 3D print a custom drawer, but for practical purposes…No). Plastic drawers are able to contain fluids indefinitely without damage to the drawer, and are easy to clean with soap and water. The con…no customization, including color.